
I'll teach you how to make a Boppy cover without a zipper. It's easy, it's cheap and it should take less than an hour.
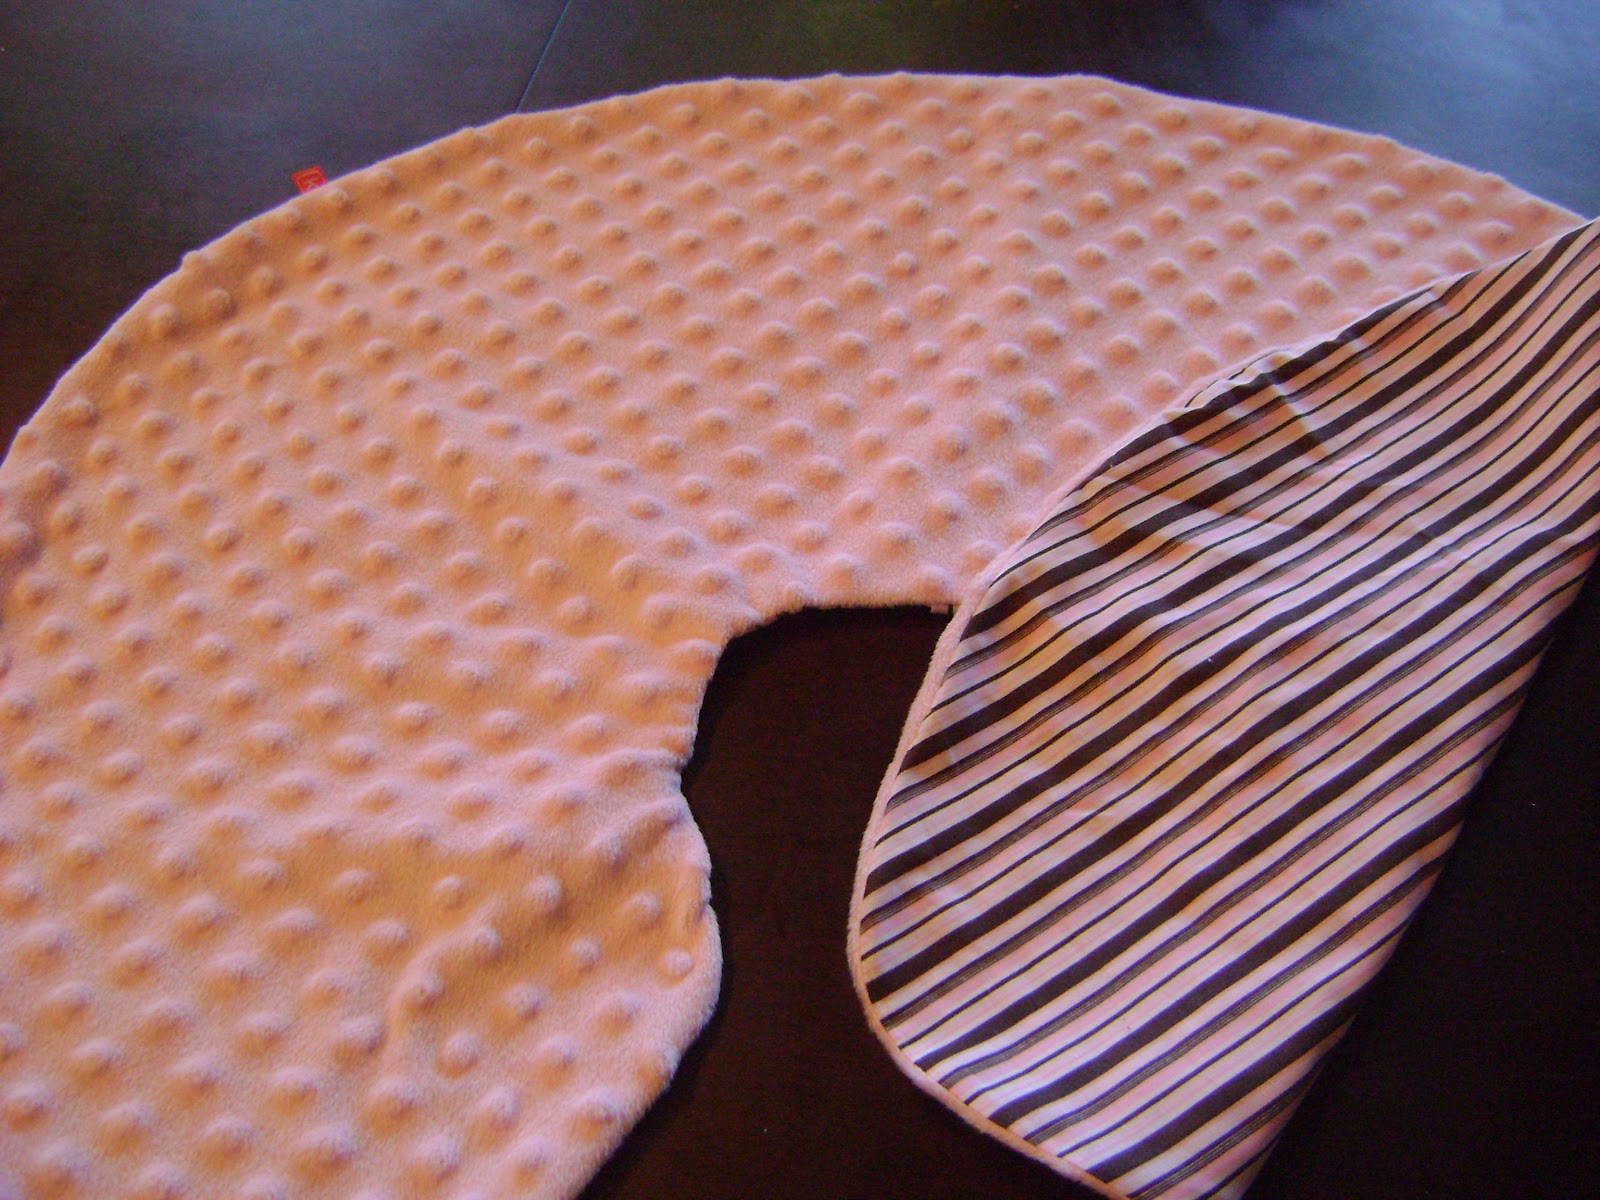
Ok so for any sewing project, to start out you need a few things: besides the sewing machine and thread, you need fabric and a pattern. I chose to use cotton on one side and super-soft minky on the other. With this pattern, there is a bottom so you need to decide which one is going to be the top. If you choose to use minky, there's no reason to use it on both sides except for aesthetics. Minky is going to run you $14.99/yard (regular price) at Joann's so conserve your expensive fabric and use a cute quilting cotton on the bottom instead! This also helps to make it a bit sturdier since Minky is very stretchy and cotton is not.You need 1/2 yard of the top fabric and 1/2 yard of the bottom or 1 yard if you are using the same fabric. There are so many cute fabrics out there to choose from! I love all the printed flannels out there that are super soft too! That might be my next one.

Ok now that you have all your supplies ready, it's time to get started!!
Fold your minky (or whatever fabric you chose for the top) in half and lay it out. Lay your pattern on top, lining up the FOLD line with your fold in your fabric. Carefully cut it out. You can pin your pattern down if you like.


Now cut this in half along the fold.


Then fold again and measure another 1" seam and iron.
Now if you have a serger, you can serge it, cutting off 1/4" and then fold 1" and iron. This is probably what I will do in the future, but it was naptime and this fabric just made it too easy!
Now sew your seam at about 7/8" and repeat for the other piece. Don't forget to backstitch at the beginning and end of each seam.

Pin generously!


Now you need to stabilize the seam. Either serge it or trim it and run a zig-zag seam all the way around.


If you are wondering just how cheap this project is, here's the breakdown:
1/2 yard of minky: $3.75 (I only buy minky if I have a coupon or it's on sale. I had a 50% off coupon for Joann's)
1/2 yard of quilters cotton: $2 (You can easily get a cute print for $3.99/yd or use a coupon
Out of pocket cost: $5.75
Time spent: 1/2-1 hour
Boppy brand minky slipcover: $25.99
Whoo-hoo! You just saved $20 in an hour or less!
Now go make a couple of these for yourself or your preggo friends!
Thank you for this amazing tutorial! Mine turned out PERFECT! Super easy instructions and awesome pictures to follow along precisely. Thanks!
ReplyDeleteThank you Roxanna! I'm going to be posting more projects soon so keep your eyes out! :)
ReplyDeleteThis is great! I can't wait to try! May I ask you where you got your labels made?! :) They are exactly what i'm looking for!
DeleteI too like the labels and have not found a place to order some. Help!
ReplyDeleteI got them on Esty. I actually blogged about them in my first post here: http://kalleymade.blogspot.com/2012/08/welcome.html?m=1
ReplyDeleteThanks! Love the labels!
ReplyDeleteThank you for this. I'm not a good sewer by any means, but I made this as a gift, and it was really easy! I hope it fits! Thank you :)
ReplyDeleteJust made one using your tutorial. SUPER helpful! Thank you so much! The only difficulty I had was stuffing the pillow inside the cover. I don't think that thing is ever coming out again! Ha! But it's alright. That's probably an error of my own, since I'm a poor sew anyway.
ReplyDeleteThanks so much for your help! Here are a couple of links to the finished piece if you're curious to see :)
http://i60.tinypic.com/9risyw.jpg (minky side)
http://i62.tinypic.com/28a0uva.jpg (flannel side)
Ok, so is there a trick in getting the slip cover on easily? I had a heck of a time trying to manipulate the pillow to get the cover on.
ReplyDeleteThat's why I make mine with 24" zippers =)
DeleteThat's why I make mine with 24" zippers =)
DeleteI am trying to make this right now and am finding that 1/2 yard of each fabric is not enough :( I would recommend buying 3/4 yard of each, or at least of the one that you need a whole piece of (the top side). I'm so disappointed that I am going to have to go back to the store to buy more fabric!
ReplyDeleteThank you! This is a great tutorial, will be making mine this week :)
ReplyDeleteSame thing for me as theologista. 1/2 is too small. 3/4 would be better. Perhaps they made boppies bigger since 2012
ReplyDelete